X2Cscope plugin for MPLAB X
Table of contents
Recommended to use the new python package for scripting: https://x2cscope.github.io/pyx2cscope/
The MPLAB X plugin is not updated anymore.
Install X2Cscope plugin within MPLAB X
You will need MPLAB X IDE v5.40 or newer. www.microchip.com/mplabx
- Open MPLAB X IDE.
- Navigate to Tools–>Plugins at the top bar.
- Slect X2Cscope for install.
- Restart MPLAB X IDE.
- Open X2Cscope from Tools->Embedded->X2Cscope
Connect X2Cscope to the device
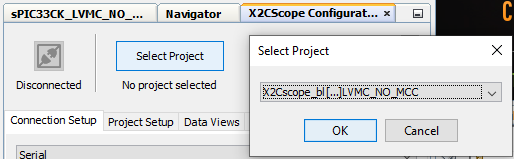
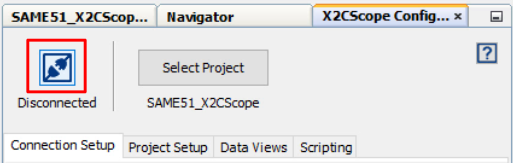
- Select project
MPLAB X support multiple project to be open, so we have to select which one to use for X2Cscope debugging.
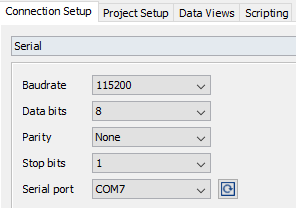
- Set communication configuration
Set the communication(Serial, CAN, TCP/IP) configuration according to the HW settings. Demos are using UART (Serial) set to 115200 8N1 by default. Check the serial port at the device manager, if you have multiple COM port.
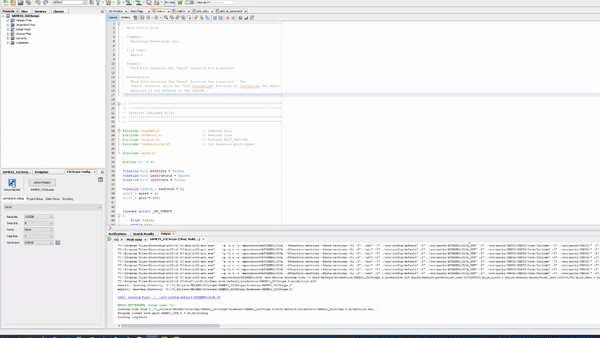
- Program your device
At this point make sure your program is running on the target device with the integrated X2Cscope library with the same communication configuration. Build the code and program your device if needed. Connect phisical communication connectors to the PC and to the hardware.
- Connect to the Device
Click on the disconnected connector icon to connect to your device.
If you get an error message:

Then go to the project settings (Right Click on the project and select Properties menu). Select the Loading category and tick the “Load symbols when programming or build for production” option.

Then apply the new settings. Then do points from 1. to 4. again.
Use the Watch window
- Set watch sampletime. (This will be the refresh rate of the watch window)
- Open Watch window from Data Views tab.
- Add/Select variables to the watch list.
- The actual values of the selected variables will be visible in run-time.
- Values of the variables can be modified. The new assigned value will be sent to the target device in run time!
- Scaling, offset and unit boxes can be used for easier representation. (These parameters will be automatically saved.)
Use the Scope window
- Set sample time of scope. Attention! Set this according to the period of X2Cscope_update(); function call. (See Firmware guide.)
- Open Scope window from Data Views tab.
- Click to the empty Source box to select source signal/variable.
- Click Sample to start the scope.
- Uncheck “Single-shot” to do continuous sampling.
- Use trigger settings if neccesary.