X2Cscope firmware manual set-up
If you are advanced programmer and do not use configurator tools like Harmony or MCC, then this guide will help you to use X2Cscope with your custom application code.
You can find a detailed tutorial video at Microcipp University training platform.
Table of contents
- 1. Get X2Cscope firmware library
- 2. Add the files to your MPLAB X project
- 3. Use/call the X2Cscope APIs
- 4. Compile then use X2Cscope
1. Get X2Cscope firmware library
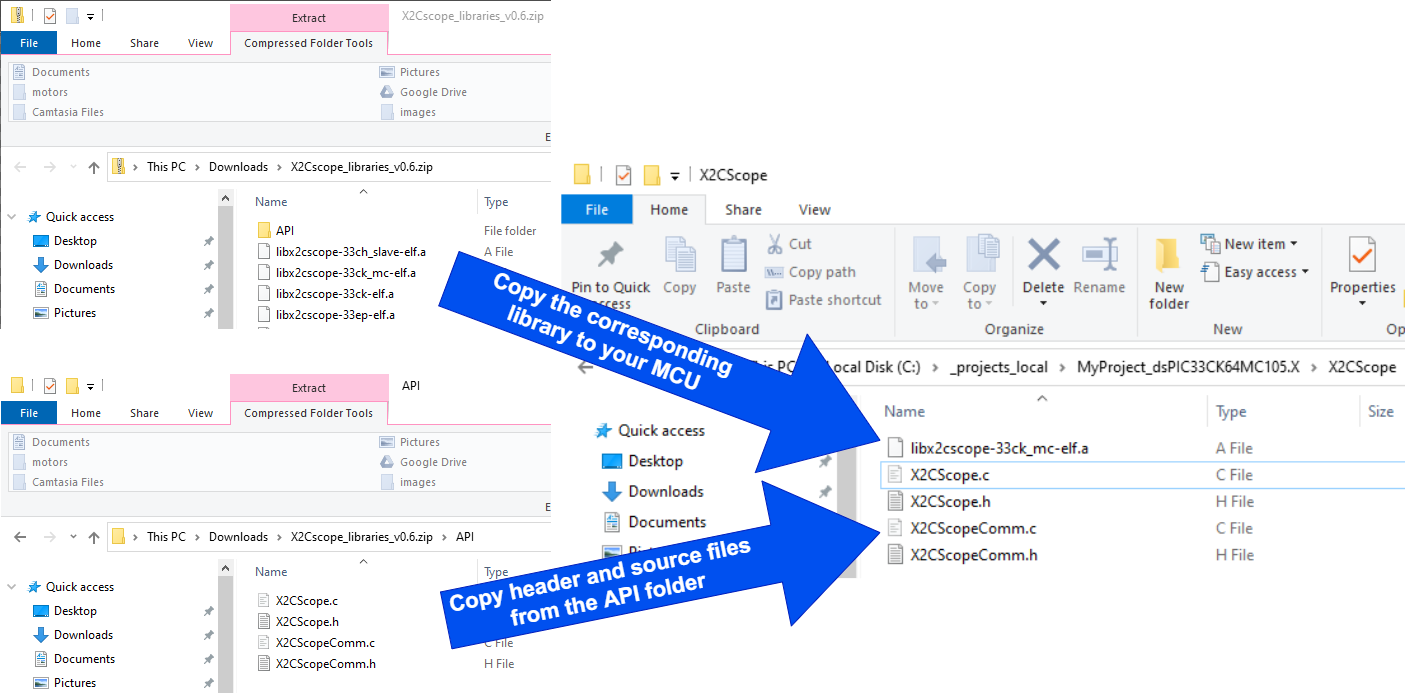
- Download the Zip package
- Copy the library file (which is corresponding to your selected MCU) from the Zip package to your project’s folder
- Copy the library header and source files from the Zip API folder to your project’s folder
2. Add the files to your MPLAB X project
- Create X2Cscope logical folders
- Add X2Cscope.c and X2CscopeComm.c source files to the MPLAB X project
- Add X2Cscope.h and X2CscopeComm.h header files to the MPLAB X project
- Add X2Cscope libx2cscope-**.a library file to the MPLAB X project
3. Use/call the X2Cscope APIs
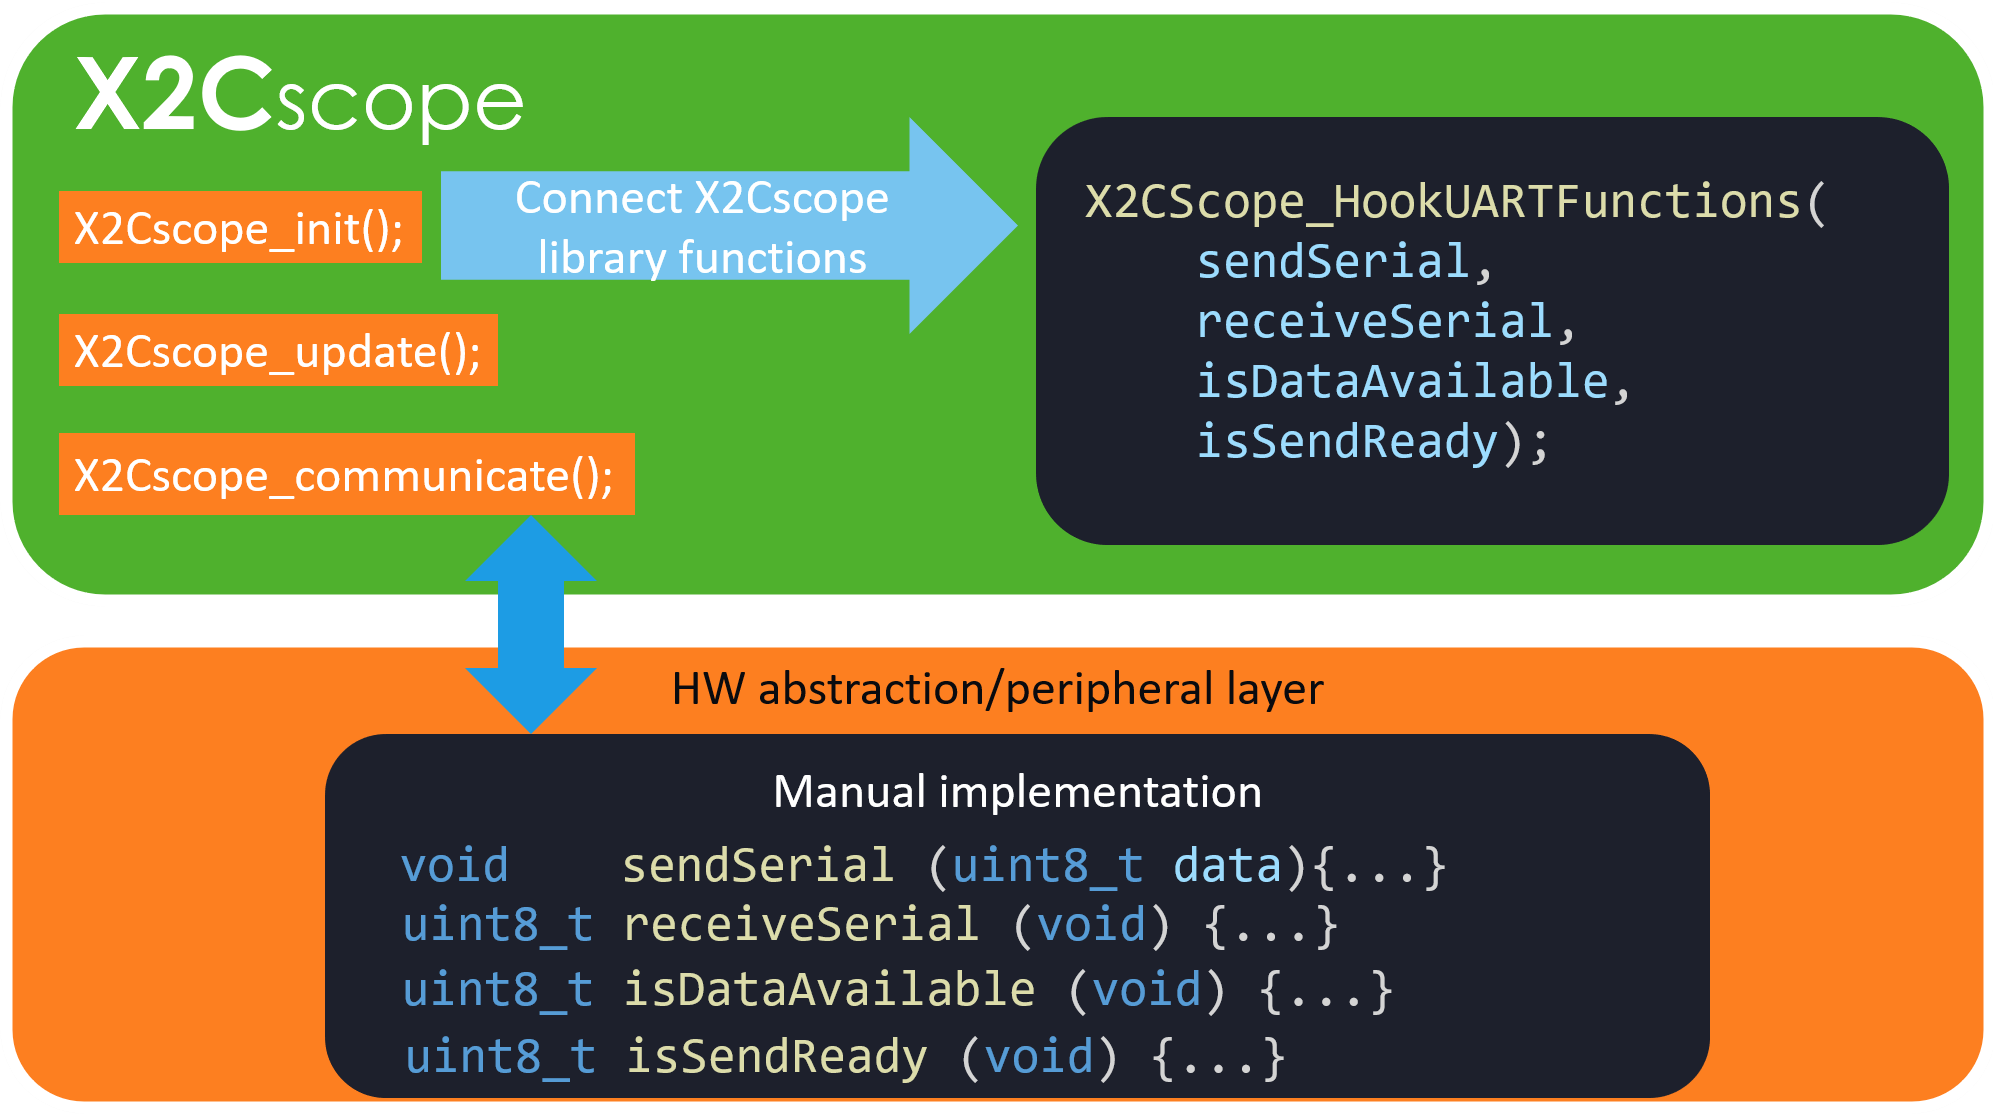
This is the most tricky part. The X2Cscope library can use different serial communication peripherals. The used communication peripheral sending/receiving functions must be connected to the X2Cscope library. This blockdiagram shows a high level overview of this mechanism.
- Configure your communication peripheral. (UART 115200/8-N-1 is recommended.)
- Implement communication interfaces in the X2CscopeComm.c file. (API reference)
- void sendSerial(uint8_t data)
- uint8_t receiveSerial()
- uint8_t isReceiveDataAvailable()
- uint8_t isSendReady()
- Initialise X2Cscope with X2Cscope_Init(); (API reference)
- Call X2CscopeCommunicate(); at the main idle loop or as a low priority task (API reference)
- Call X2Cscope_Update(); periodically at an interrupt. (API reference)
4. Compile then use X2Cscope
At this stage the project is ready to use with X2Cscope.
- Compile and program the device
- Connect to the HW with the X2Cscope GUI
- Use X2Cscope watch and scope windows